Submitted by AliaK on Sat, 02/11/2013 - 12:34
Textiles 1 — A Creative Approach — Assignment 1
student name: Kathleen (Kath) O'Donnell
student number: 511607
Assignment 1 — Reflective Commentary
(based on assessment criteria points)
also available as a downloadable PDF file — 77Kb, 2 pages
Demonstration of Technical and Visual Skills materials, techniques, observational skills, visual awareness, design and compositional skills
Whilst working on the class exercises, I learnt many new techniques, including mark-making with various materials, hand embroidery stitches and how to do machine embroidery. I began to see patterns and marks whilst I walked around the city, and began to see shapes that could look interesting when stitched. Once I learnt a few embroidery stitches, I began to see them everywhere in the streets, in my hotel rooms and in in ordinary, pataphysical objects. I'm still working on my sketching, as I still don't feel as confident doing this, but I enjoy taking photographs of different patterns instead. The class exercises did help in "freeing up" my drawing skills and ways of thinking.
Submitted by AliaK on Fri, 01/11/2013 - 12:32
A Creative Approach — Project 2 Developing your marks — Stage 6 — Using thread and yarns to create textures
In this exercise we had to use different threads and yarns to create textures.
front side:
rear side:
I tried another - with different layers of fabric, different stitches and different/multiple threads of varying weights.
close ups:
rear side:
I had made some small sketches (finding I like the A5 size, small but handy to carry around), so the stitching above is based on some of the shapes in these sketches.
Reflection:
• Can you begin to see the relationship between stitching and drawing?
yes, definitely. I can see it more and more since working on these exercises. I think I have even started to draw/sketch with stitching in mind.
• Were you able to choose stitches which expressed the marks and lines of your drawings?
yes, I learnt a few stitches including running stitch, back stitch, blanket stitch, stem stitch, chain stitch, cretan stitch, satin stitch and was able to adapt some of these to match the marks in some of my sketches.
Submitted by AliaK on Wed, 21/08/2013 - 11:56
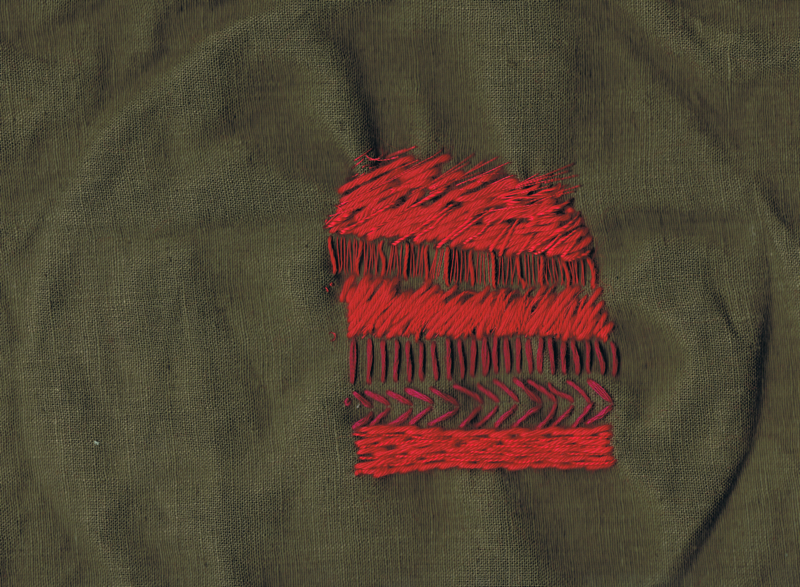
A Creative Approach — Project 2 Developing your marks — Stage 5 — Stitches which create texture
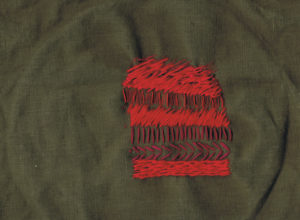
In this exercise I had to work stitches in different directions, initially using the same type of thread, and then introducing other weight threads. I used a single colour thread (or as close as possible) for each sample. Some threads are shiny and thin whilst others are thicker, multi-threaded and matte. when you mix them together you can see the difference in texture each creates, as well as different textures caused by the different amount of light the threads reflect.
I began with satin stitch in red shades, using different stitch lengths and shiny and matte thread. The rows of satin stitch sit nicely next to each other. Some of the threads look softer and others look rougher.
My favourite sample is the thin white triangle peaks. The stitches are fairly close together, thinner at the bottom of the upside down V and there's a thicker gap at the top. I stitched different number of rows along the rows. I think this makes a nice pattern and it's something I could use in a project. I'd tried he triangle peaks in thicker orange yarn too but I don't think it's as effective — it seems to soften the edges, whereas the thinner white thread is more precise so the lines are more defined and crisper to my eyes.
Submitted by AliaK on Mon, 19/08/2013 - 11:54
A Creative Approach — Project 2 Developing your marks — Stage 4 — Preparing to create textures
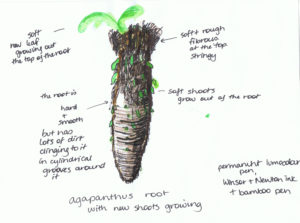
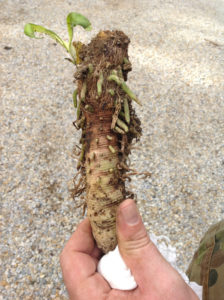
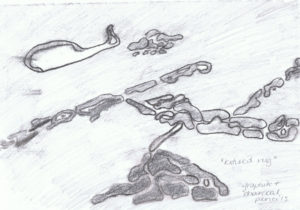
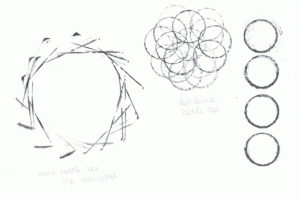
In this exercise I had to look through some of my previous work and think about them in terms of textiles and creating textures. I looked at some of my sketches, but one stood out the most is the Agapanthus root from stage 3, exercise 2 — it's the ugliest topic and drawing but I think it does show a lot of texture. It's both rough and shiny, lumpy and distorted, it has hard and soft parts, and chaotic stringy parts.
Here's the drawing and original photo:
Submitted by AliaK on Mon, 12/08/2013 - 11:51
A Creative Approach — Project 2 Developing your marks — Stage 3 — A Sample
For this exercise I chose one of my ink drawings which is mostly line based. I hand stitched in running stitch and stem stitch — in different directions and with a mixture of threads, some shiny, some matte, some thick, some sewing machine rayon so very thin. A couple of the diagonal sections turned out quite textural and layered. They have multiple threads and layers so are quite raised on the surface of the fabric. These probably would suit the following exercises. The stitches are all line based stitches though, so it shows how they can be used to create both line and texture.
Here's the ink drawing which was used for inspiration. The top two diagonal / horizontal sections are a bit different — I was enjoying seeing the different light on the threads poke through as I stitched, so this is a bit of interpretation rather than accurate portrayal of the original picture.
Submitted by AliaK on Mon, 05/08/2013 - 11:44
A Creative Approach — Project 2 Developing your marks — Stage 2 — Exploring marks and lines through stitch techniques
For this exercise, I started with machine embroidery. I dropped the feed dogs and put the fabric into the hoop, but I had to remove the footer each time I had to start sewing. The first stitch I tried, the machine just sewed on the same spot — almost like satin stitch. I found it really hard to move the fabric around. So I ended up taking the fabric out of the embroidery hoop, lifting the feed dogs again and sewing normally. This time I used red thread so it's easier to see the stitches (the first exercise was off-white on cream calico so is harder to see the stitches clearly). I didn't have any other machine threads of different weight to try the hand wound bobbin.
I made some parallel lines, moving closer together until they made a solid area (albeit small solid area!)
and I tried some circles, though they're a bit wonky. I also tried some "squaretooth" stitches as I liked the shape of these. I must have a tension issue as there's a bit of puckering of the fabric where the stitches have pulled the fabric around the stitches. I did try different stitch lengths. When I did the test swatches I found that tension=3 was the best setting, so I kept this the same for all the stitchings
Front side of the fabric:
Submitted by AliaK on Sun, 04/08/2013 - 11:41
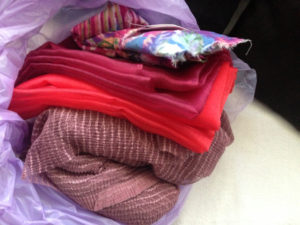
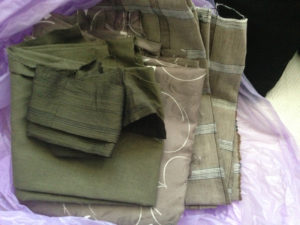
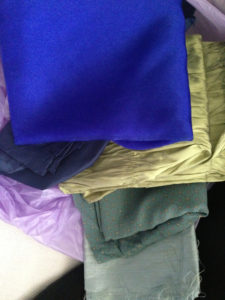
A Creative Approach — Project 2 Developing your marks — Stage 1 — Preparation
The first stage of this exercise was to sort my fabric stash into bags. I chose to separate them by colour. There are a couple of crossovers with the greens/browns.
Submitted by AliaK on Fri, 02/08/2013 - 11:38
A Creative Approach — Project 1 Marking marks — Stage 4 — Working from your sketchbooks — review
Review questions
Submitted by AliaK on Tue, 30/07/2013 - 11:36
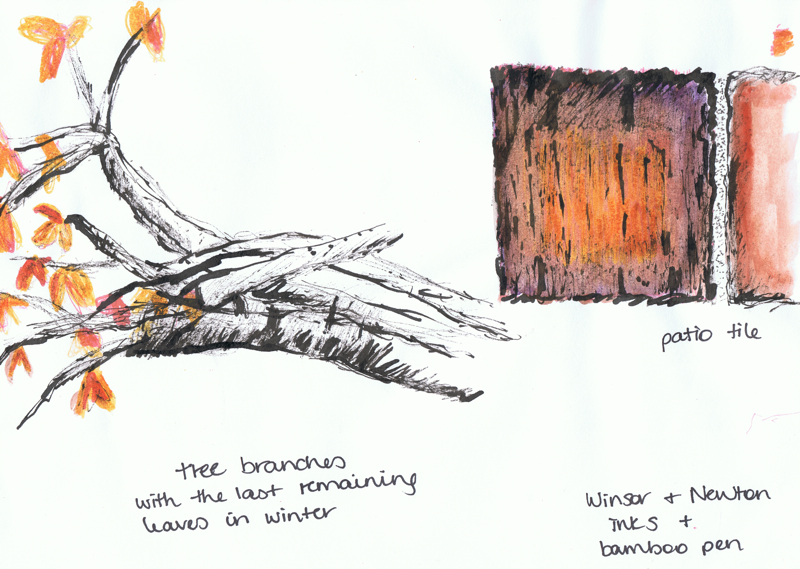
A Creative Approach — Project 1 Marking marks — Stage 3 — Exercise 2 — Using marks to create surface textures
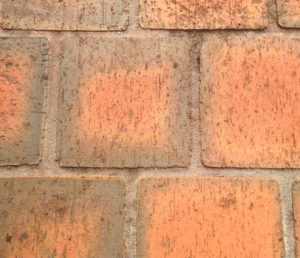
This exercise involved recreating the textured surfaces of objects.
This first page has a drawing trying to replicate the texture of patio tiles, and another showing the branches and remaining leaves of a tree that had lost its leaves during winter — as viewed from the patio whilst looking across the garden. I painted the watercolour wash over the ink drawing in the evening, and thought I was using a brownish grey colour but when I checked in the light of day the next day, I'd actually used a purple colour. Oops. So the colours are not 100% accurate but hopefully the feel of the texture shows through:

Submitted by AliaK on Tue, 30/07/2013 - 11:23
A Creative Approach — Project 1 Marking marks — Stage 3 — Exercise 1 — Using marks to create surface textures
This exercise involved using marks to create surface textures — working from visual sources.
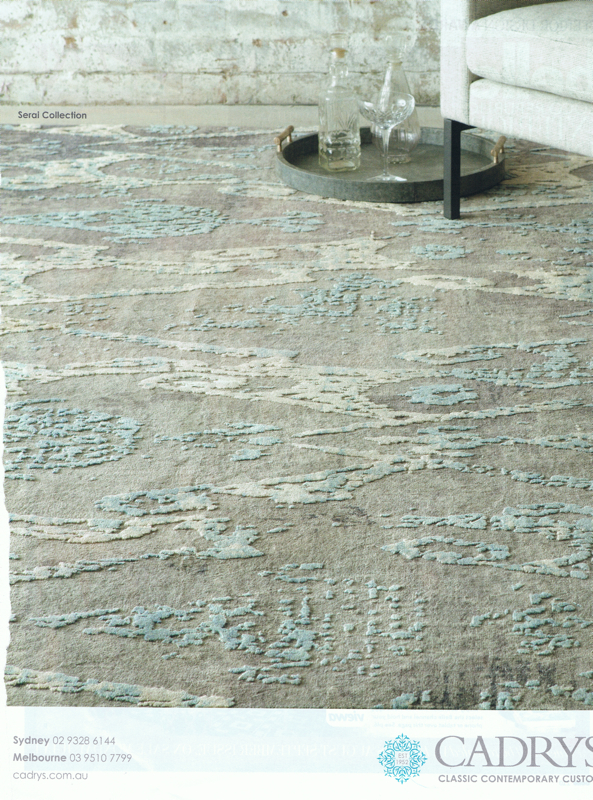
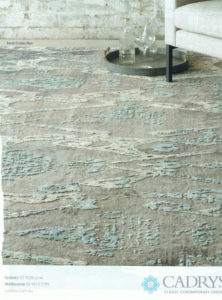
For these exercises I used pages from a magazine - "belle" magazine, june/july 2013
This first one is trying to replicate the textured rug, using graphite and charcoal pencils:
Submitted by AliaK on Mon, 08/07/2013 - 13:24
A Creative Approach — Project 1 Marking marks — Stage 2 — Exercise 4
This exercise involved making marks with many other types of materials.
Block printing — a wine bottle box + softdrink bottle cap with ink stamp pad:
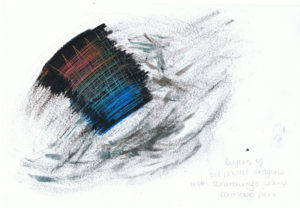
Layers of coloured water based oil pastel crayons with scratchings using a bamboo pen:
I like this one - the colours peeking through seem quite electric - almost neon. I think it's because of the surrounding black colour making them 'pop'
Submitted by AliaK on Mon, 08/07/2013 - 13:19
A Creative Approach — Project 1 Marking marks — Stage 2 — Exercise 3
This exercise involved repeating exercise 1 using a wider range of materials — paints, coloured pencils, crayons, sticks, brushes, sponges, etc.
Submitted by AliaK on Sat, 06/07/2013 - 13:17
I've been thinking about what to use for my theme/s - am not sure if they'll fit yet, but here's my initial ideas:
1. encryption/code/glitch - I've read about women who've (over the centuries) added codes to their fabric to send messages to others - encrypted messages in textiles. it fits in with my work too (encrypted digital tv signals/video/audio). and glitch maybe due to something Jack spoke about (how he likes glitch in video but I try to remove it/prevent it at work - so a balance between work & home) & another class I did & the music equipment/making anomolies that turn out to be something beautiful/special/unplanned - the glitches in the code, the mistakes. I've made some (very rough) video art using glitch over the years, so thought it might fit in
2. sound art/experimental music (maybe dance music culture, hip hop too) - not really sure how I'll fit this in yet, but it's another thing I write on, so trying to think of a way to fit it in - it might end up just being a separate project & I use the things in #1. maybe the music part of it - I think a lot of experimental music/sound art could be converted to embroidery - the lines & patterns & feel of the music into colours and lines.
Submitted by AliaK on Tue, 16/04/2013 - 13:13
A Creative Approach — Project 1 Marking marks — Stage 2 — Exercise 2 — Making marks in an expressive way
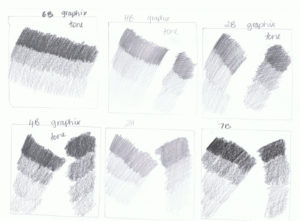
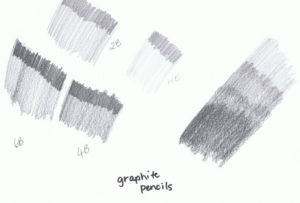
This exercise involved using different pencils to show 3 areas of tones — dark, medium, light.
I used a mixture of graphix and graphite pencils of different grades.
Submitted by AliaK on Mon, 08/04/2013 - 13:07
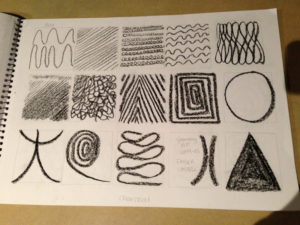
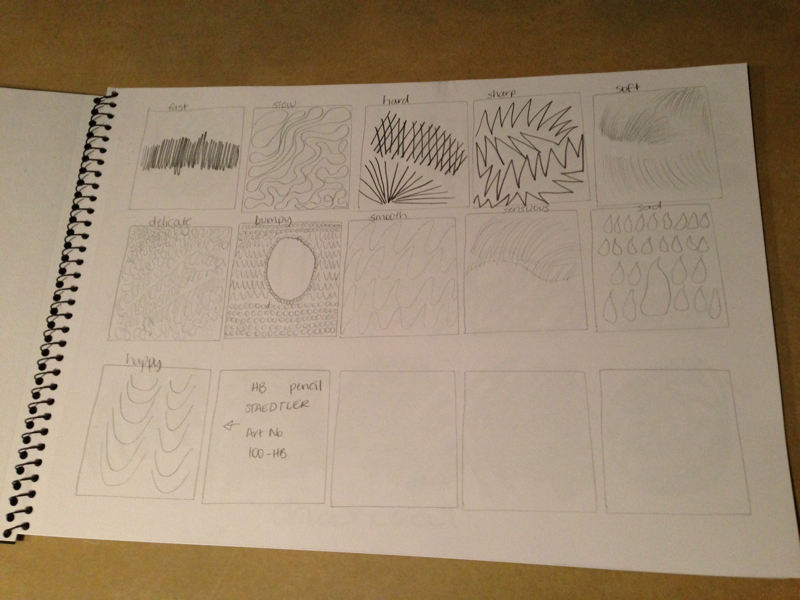
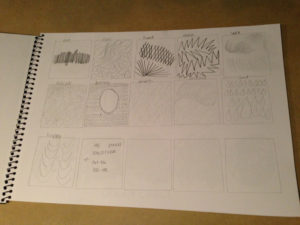
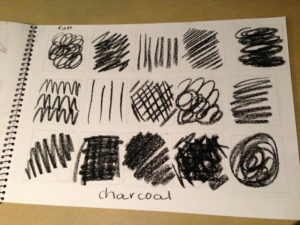
A Creative Approach — Project 1 Marking marks — Stage 2 — Exercise 1 — Making marks in an expressive way
Stage 2 - Exercise 1
Making marks based on the words: fast, slow, hard, sharp, soft, delicate, bumpy, smooth, sensuous, sad, happy using a variety of pencils
The first exercise we had to make marks using the theme words. I did this in my A3 book. For this exercise I used an HB pencil, charcoal, and a watercolour pencil
For the first page, I tried one square for each word:
Then I changed to using one A3 page per word for a few selected words.
fast:
slow: